
The Art of Visual Storytelling: What is Cinematic Photography?
Have you ever stopped scrolling because of a single image?
Not because it was technically perfect. Not because it was the sharpest photo you’ve ever seen. But because something about it felt like a story frozen mid-frame. That’s cinematic photography. And it’s not an accident.
What Does “Cinematic” Actually Mean?
Here’s what cinematic photography is not:
-
It’s not just adding black letterbox bars to a photo.
-
It’s not running a moody Lightroom preset and calling it finished.
-
It’s not desaturating everything and throwing in fake grain.
Cinematic photography is a planned visual language taken directly from filmmaking.
Every lighting choice, every framing decision, and every color grade all work together to make one still image feel like it belongs in a larger story.
The best way to understand it? Imagine a film paused on a single frame. You can feel the mood. You sense something just happened or is about to happen. The frame alone tells you something without a single word. That’s what separates a cinematic photograph from a standard one.
What Makes an Image Feel Cinematic?
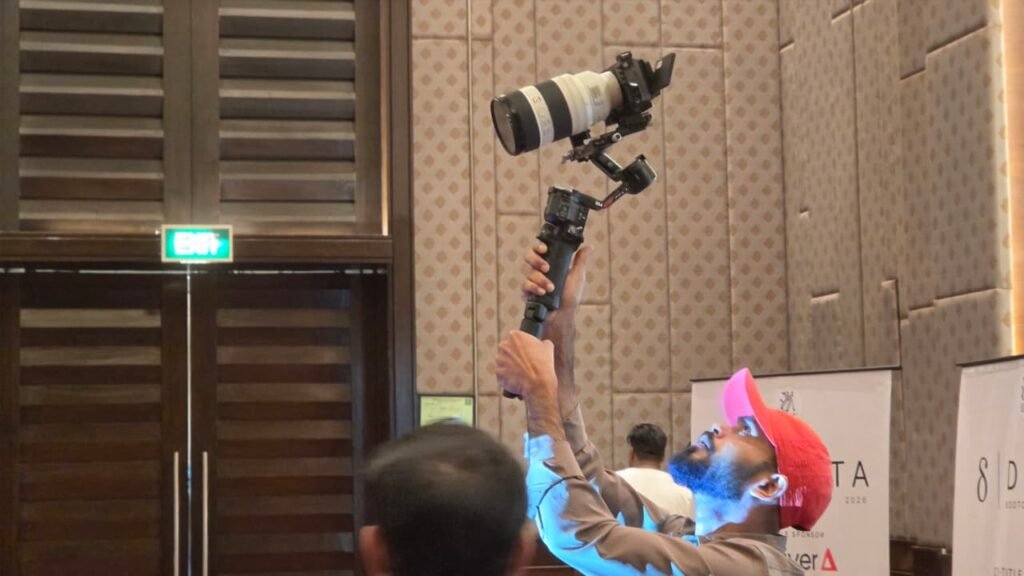
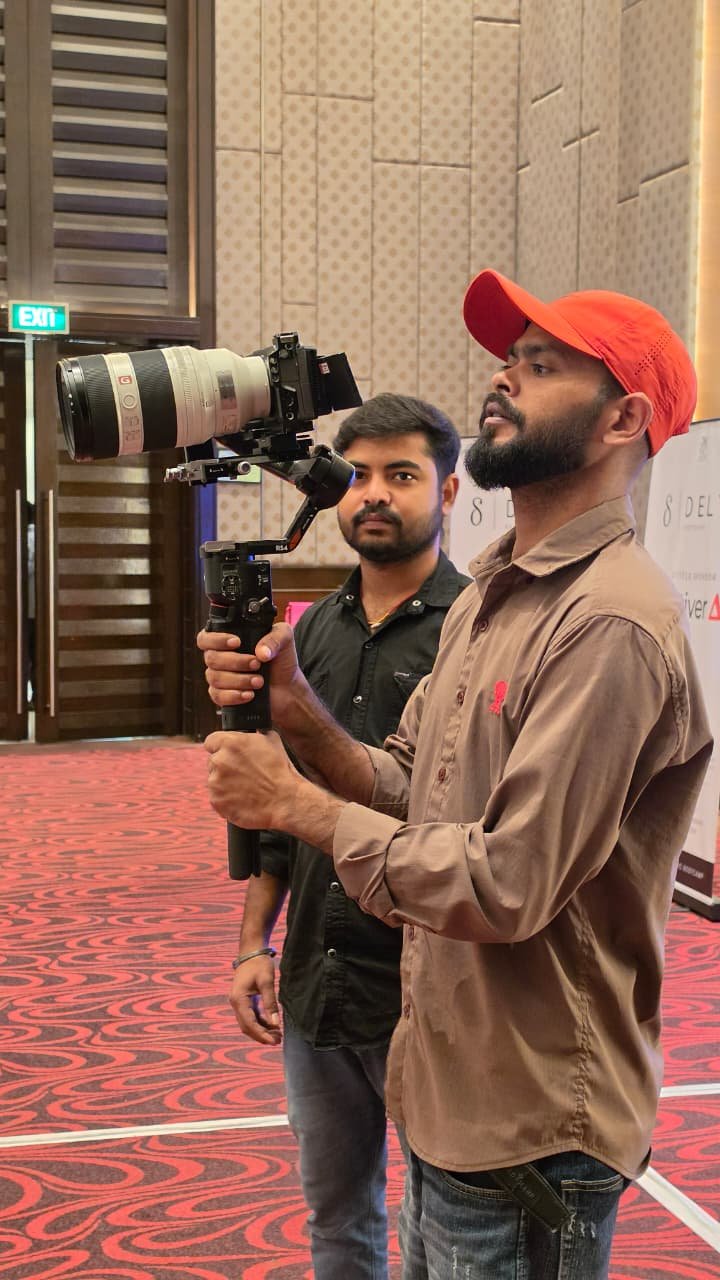
Telephoto reach in a crowded room — the subject stays sharp, the environment compresses naturally, and nobody in the audience knows they’re being filmed.
There are three essential elements present every single time:
-
Atmosphere: Deep shadows, soft highlights, or a layer of haze that instantly sets a mood before the viewer consciously processes anything.
-
Context: The environment around the subject tells as much of the story as the subject itself. A person standing in an empty corridor communicates something completely different from the same person standing on a neon-lit street.
-
Implied Motion: The best cinematic frames suggest that something dramatic happened a second ago or is about to happen next. The scene feels alive, even though it’s still.
The 5 Core Pillars of Cinematic Photography
1. Motivated Lighting & Contrast
In cinema, no light is accidental. Directors of photography refer to it as motivated light — light that seems to come from a logical source within the scene, such as a street lamp, a neon sign, a sunlit window, or a candle on a table.
This creates high contrast, deep shadows, and a strong separation between the subject and background — what classical painters called chiaroscuro. This is the biggest difference between a flat, evenly-lit photograph and one that makes you stop mid-scroll.
Cover a large corporate conference in a hotel ballroom. Walk in, get the shots, don’t disturb anyone.
What wasn’t simple was the light.
The moment I walked into that ballroom, two things hit me immediately. First, a massive crystal chandelier hanging dead center of the ceiling, throwing warm white light downward across the entire room. Second: blue LED accents embedded in the chandelier rings, creating a secondary cooler layer that competed with the warm tones below.
Most photographers would fight this. Try to overpower it with external lighting. Bring in softboxes, fight the mixed color temperature, spend 30 minutes setting up gear in a room full of 200 people who are already seated.
I decided to use it instead.
The chandelier became my key light. I let the warm tones fall on faces and tables in the foreground. I let the blue accent bleed into the background and upper frame. That natural split warm foreground, cool background is the exact color contrast that makes an indoor event frame feel cinematic rather than flat.
No additional lighting was brought in. The room gave us everything we needed. The job was simply to position correctly and let the motivated light do its work.
2. Strategic Color Grading
Color is the fastest emotional trigger in visual media.
-
Teal and Orange: The most recognizable cinematic combination — warm skin tones and amber highlights against cool teal shadows. It’s used in everything from Hollywood blockbusters to luxury car campaigns because it creates instant visual tension and warmth at the same time.
-
Muted Blues & Earth Tones: These tones draw the viewer into something more introspective, like mystery, isolation, or nostalgia.
The color grade isn’t applied randomly. It’s chosen based on the emotional response you want the viewer to have in the first three seconds.
3. Widescreen Framing & Aspect Ratios
Standard cameras shoot in $3:2$ or $4:3$ ratios — the same proportions as a printed photograph. Cinematic photography shifts to 16:9 or 2.39:1 (Anamorphic widescreen).
This horizontal stretch changes everything about how the viewer interprets the frame: more negative space, more environment surrounding the subject, and more room for the story to develop. It’s a small technical change with a huge psychological effect on how the image feels.
4. Depth of Field & Lens Choice
Extreme wide-angle lenses distort edges, warp perspective, and make spaces look unnaturally large. This is why standard real estate photography often seems unconvincing — the proportions feel incorrect, even if the viewer can’t immediately say why.
Cinematic photography uses 35mm to 85mm focal lengths — the range that best replicates how the human eye perceives space. Combined with a shallow depth of field ($f/1.4$ to $f/2.8$), the subject is clearly separated from a softly blurred background. The viewer’s eye is directed exactly where you want it to go.
A wide lens in a room this size would have been a mistake.
With 200 people seated at round tables, getting close enough with a standard lens to fill the frame means walking into the crowd, disturbing sightlines, and becoming part of the event rather than a silent observer of it.
The telephoto zoom solved all of that.
Standing at the edge of the room, I could reach across the entire floor and isolate a speaker, a reaction, a handshake without taking a single step toward the subject. The background compressed naturally. The foreground blurred. And the subject had no idea the camera was on them, which meant the expressions were real.
That’s the thing about telephoto work at events that nobody talks about enough. It’s not just about focal length. It’s about invisibility. A 200mm reach makes you a ghost in the room. And ghosts get the honest moments.
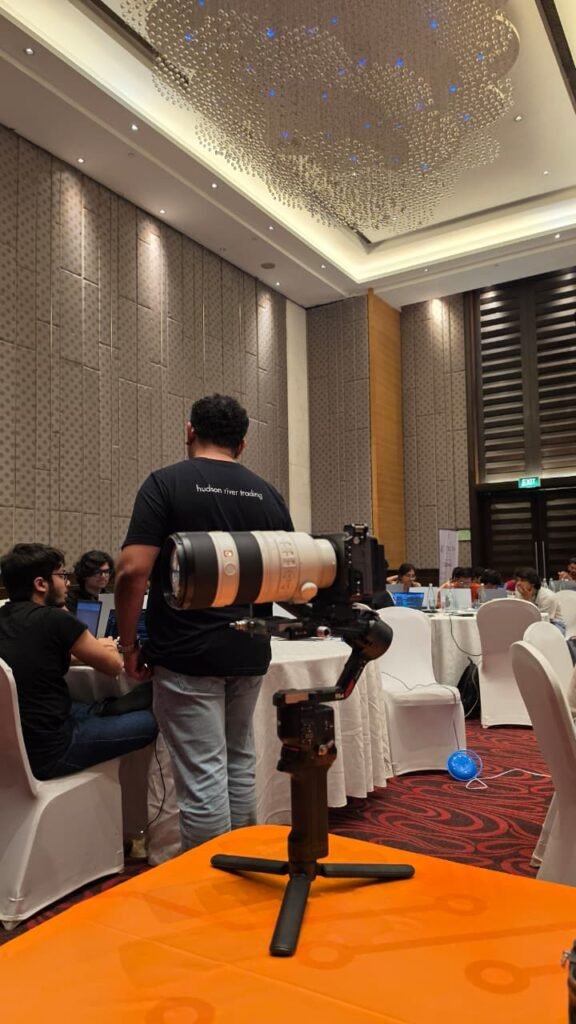
Between shots, the rig goes down on a portable tabletop tripod. Not a full tripod there’s no space, no time, and no clean place to plant one in a room this packed. The tabletop support is a small thing. But on a 6-hour corporate shoot, it’s the difference between a crew that arrives fresh at hour five and one that’s already tired. You protect your hands. You protect your gimbal calibration. You stay ready.
5. Implied Narrative — The Unseen Story
A standard portrait shows what someone looks like. A cinematic portrait shows who they are or what they’re experiencing.
Through a subtle averted glance, a hand resting on a surface, or a detail slightly out of focus in the background, the image leaves space for the viewer’s imagination to fill in the story. That open loop is what makes people look at a photograph for more than two seconds.
How to Actually Shoot Cinematic Photos: A Practical Guide
Step 1: Shoot During Golden Hour or Blue Hour
Midday sun is the enemy of cinematic photography. Harsh overhead light flattens everything, wipes out shadows, and creates even exposure that makes a scene look like a documentation shot rather than a narrative one.
-
Golden Hour: The 45 minutes just after sunrise or before sunset provides soft, warm, low-angle light that wraps around subjects and architecture.
-
Blue Hour: The 20 minutes right after sunset creates cool, ambient, moody light that’s perfect for interiors, urban scenes, and mysterious atmospheres.
Plan your shoots around these times, not around convenience.
Step 2: Find and Use Practical Light Sources
For indoor or night photography, skip the flash. Look for practical lights — existing light sources within the scene like neon signs, car headlights, tungsten desk lamps, light spilling through a frosted glass door, or candles.
Position your subject so these sources cast soft, directional light across them rather than flooding the frame evenly. Real, motivated light sources give a sense that the photograph exists in an actual world, not a controlled studio.
There’s a problem that every event cinematographer eventually faces in a large ballroom.
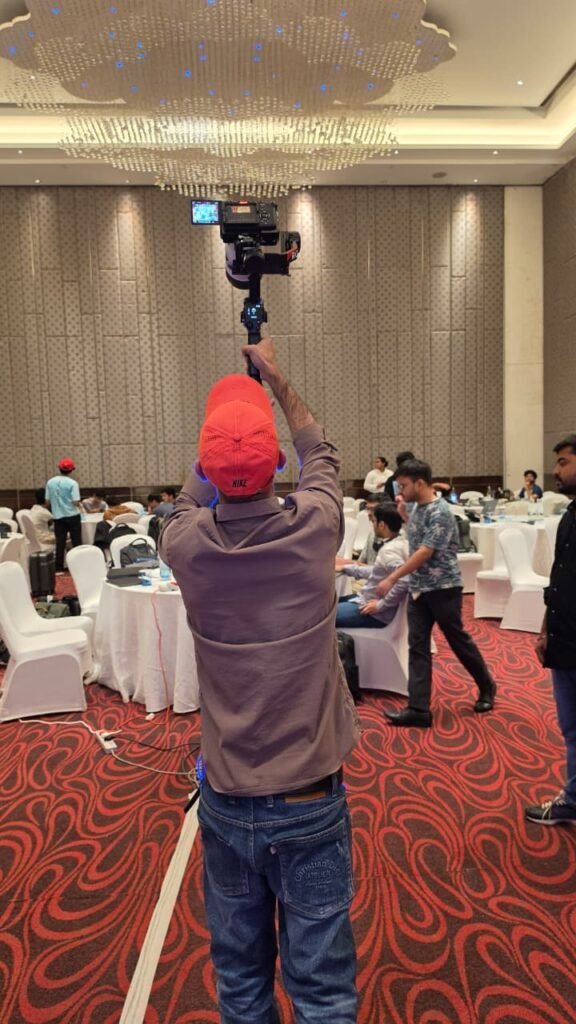
You need a wide establishing shot that shows the full scale of the room, the chandelier, the crowd, the energy. But the camera at chest height only sees the backs of heads. At eye level, same problem.
The solution is the overhead hold.
Both arms go up. Gimbal fully extended above the head. The camera flips its screen downward so you can monitor the frame. And then you walk — slowly, smoothly, while the camera floats above the crowd at a height that clears every head in the room.
It’s not comfortable. A heavy telephoto on a gimbal at full arm extension above your head is genuinely demanding to hold steady. The trick is to keep your elbows slightly bent rather than locked straight, let the gimbal’s stabilization do the micro-correction work, and move from your feet rather than your arms.
The chandelier from this angle becomes the hero of the frame. Warm light cascading down. Blue accents glowing in the rings. The crowd spreads below. It’s the kind of establishing shot that tells the viewer immediately — this is a significant event, and you are inside it.
That’s what practical light sources give you when you position correctly. The venue does the dramatic work. You just have to find the angle that shows it.
Step 3: Add Diffusion and Physical Haze
Cinematic images rarely look hyper-sharp or overly clean. A Black Pro-Mist filter or diffusion filter on the lens softens bright highlights and removes the harsh digital edge, feeling more like analog film.
On location, physical elements add depth — early morning mist, humidity haze, smoke from a practical source, or rain on a window. Light passing through haze becomes visible, and visible light is cinematic.
Step 4: Post-Processing — Color Wheels and Film Grain
The edit is where a good photograph becomes a cinematic one:
-
Crop to Widescreen: Test $16:9$ or $2.39:1$ before doing anything else to reframe how the image reads.
-
Split-Toning: Carefully adjust the color wheels to add cool tones (teal, blue) in the shadows and warm tones (orange, amber) in the highlights.
-
Add Film Grain: A subtle layer of digital grain removes the clinical “overly digital” look and adds tactile warmth.
The One Thing That Actually Makes an Image Cinematic
It’s not the camera. It’s not the lens. It’s not the filter. It’s not even the location.
It’s the intention behind every decision — the light, the color, the frame, the moment — all working together to evoke a feeling before the viewer consciously understands what they’re looking at.
That’s what distinguishes documentation from storytelling. In a world where every phone shoots in 4K, storytelling is the only thing that gives a visual asset real value.
Transforming Real Estate & Luxury Branding in Mumbai
For real estate developers, interior designers, and luxury brands in Mumbai, cinematic photography isn’t just a style upgrade. It’s a business decision. It’s the difference between a buyer scrolling past and a buyer stopping and eventually calling.
Want to see how this applies specifically to real estate photography or commercial drone photography for aerial coverage in Mumbai?